

Images by Kevin Fielding.
Music and the search for better sound reproduction have always been my passion. I realized, early on, that bass was a big part of what I liked about sound and critical for the music to elicit in me an emotional response. But to achieve ultimate bass—the deepest, most solid, most seamless bass—requires getting many things right: quality subwoofers, ideal subwoofer locations with the best frequency response, speaker and subwoofer time-alignment, acoustic treatments, and equalization. While each of these factors is worthy of its own article, the focus of this article is on examining three different ways one can connect a subwoofer within a two-channel system. While there may be other approaches, I’ve included two standard ways and one less popular one with more flexibility than the other two.
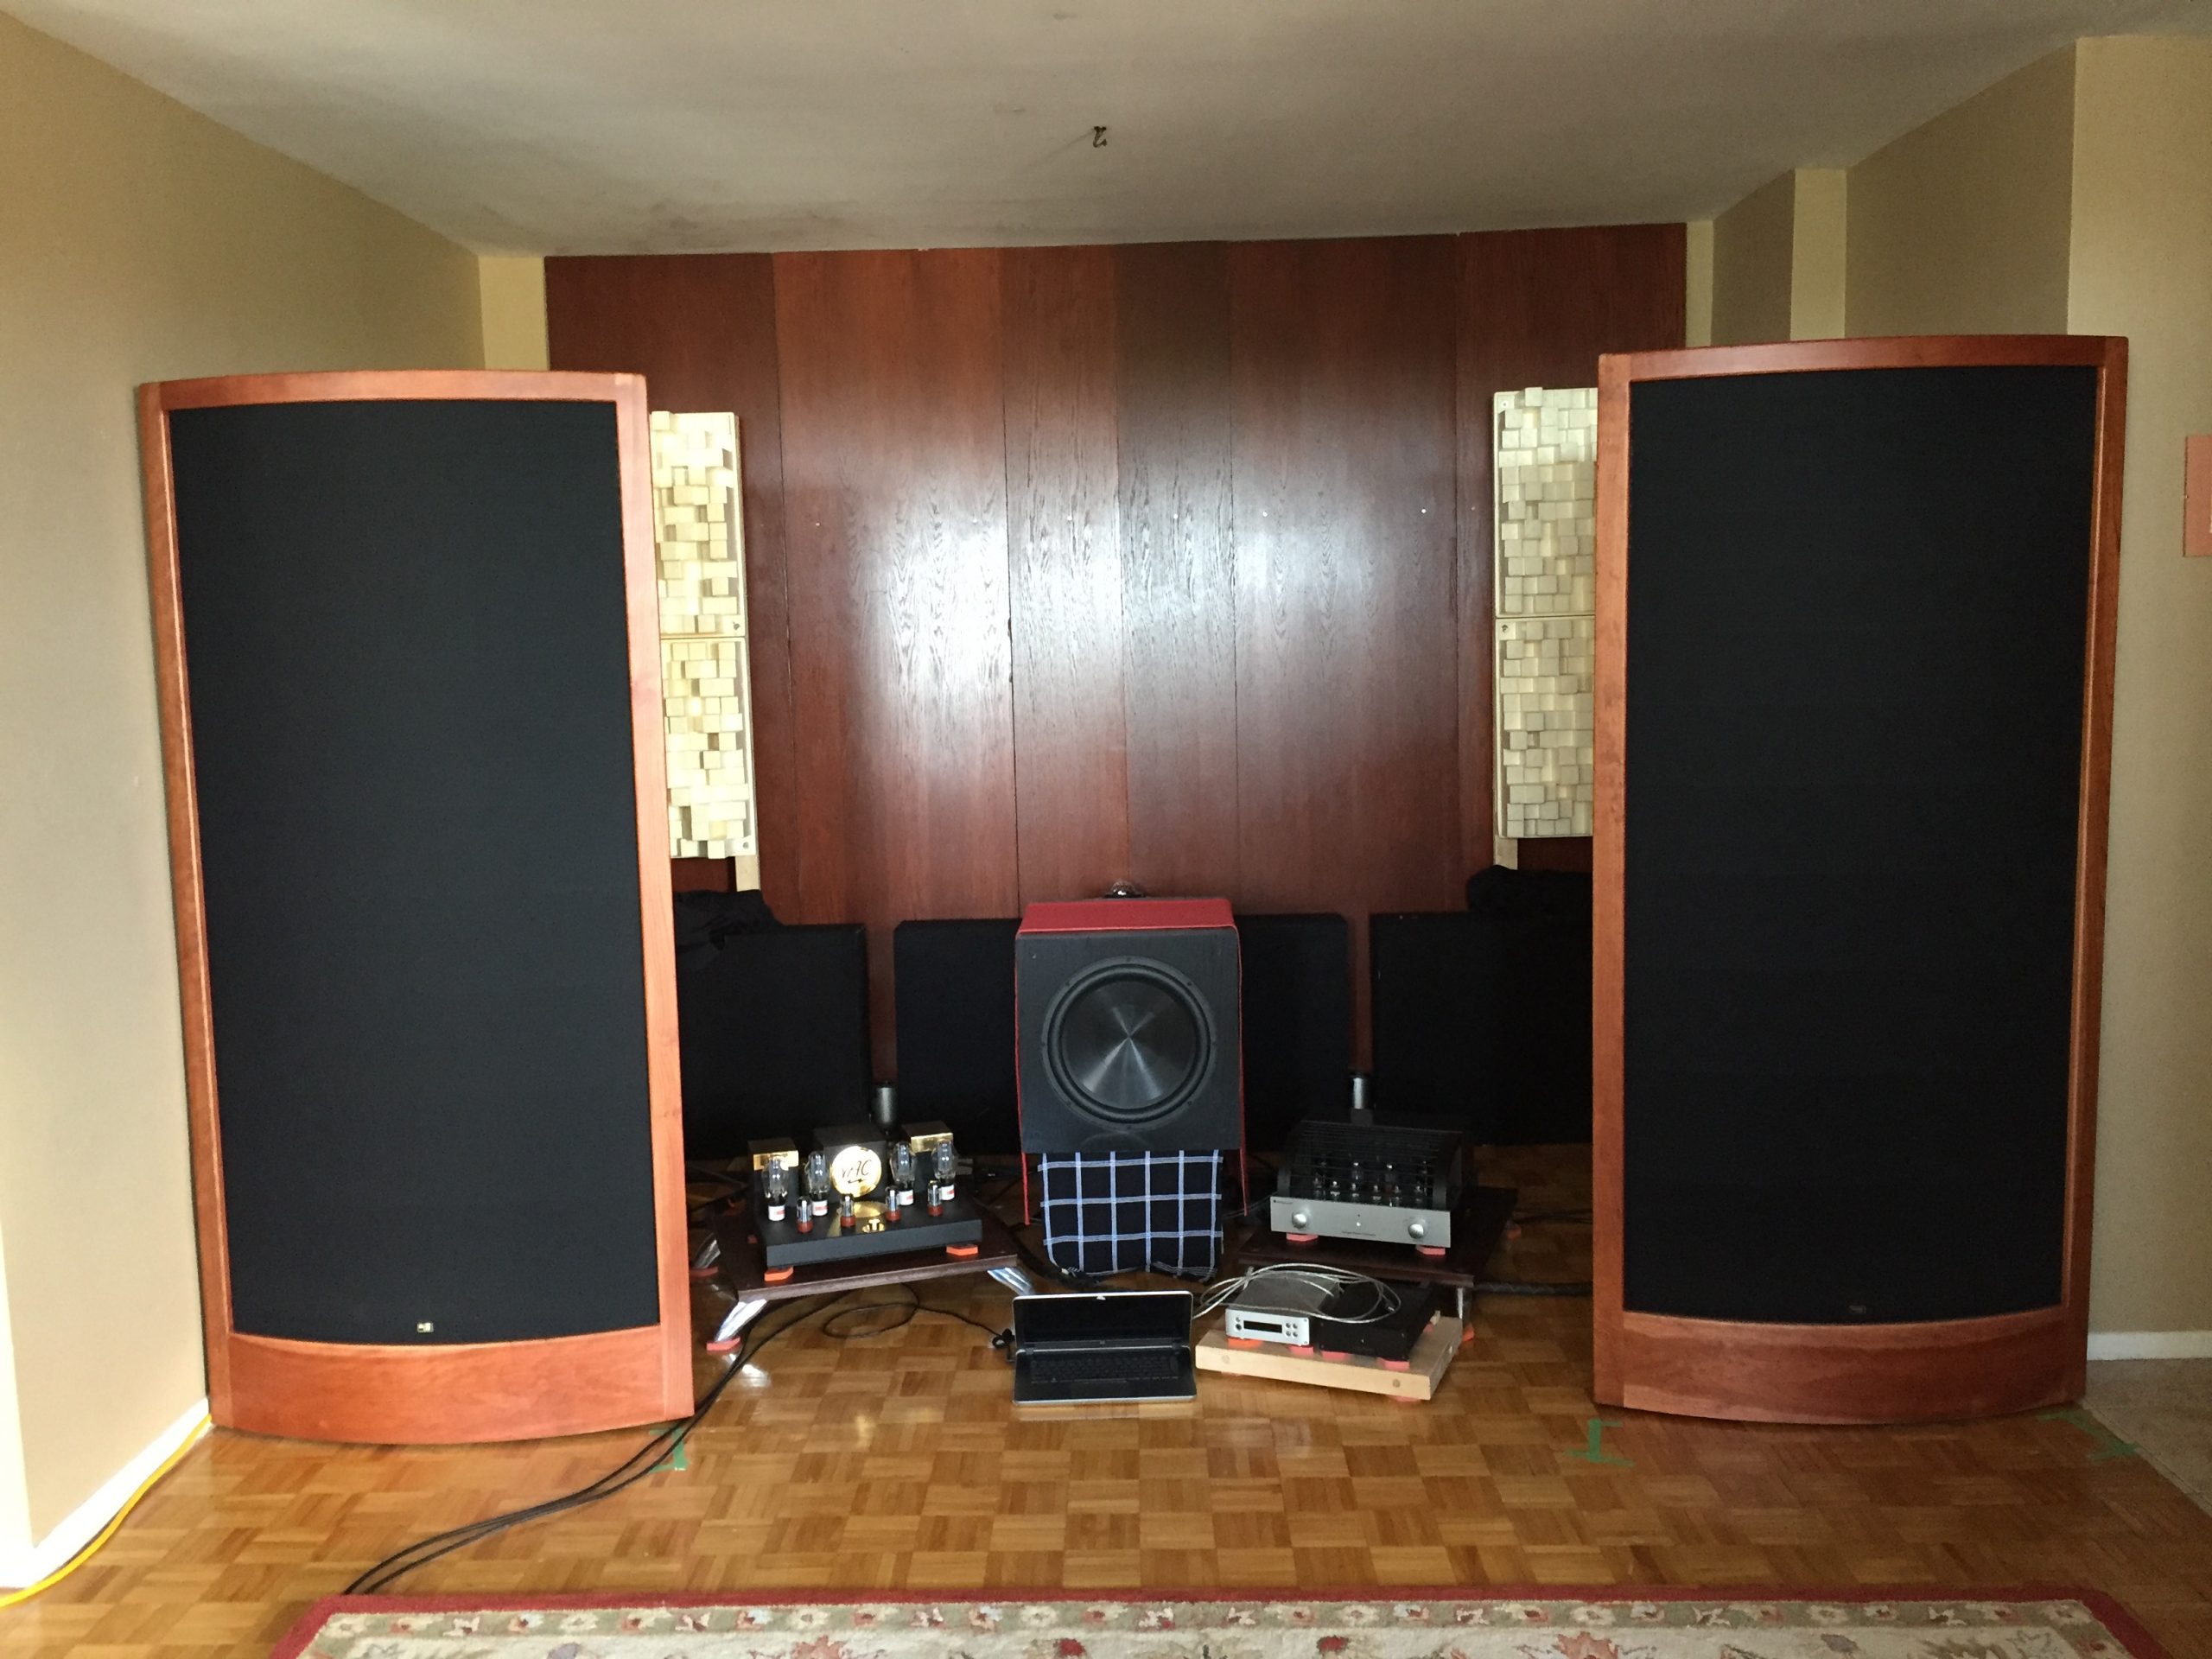
I don’t use tools that automatically equalize and time-align speakers, such as DIRAC, Anthem Room Correction, or Audyssey. Instead, I use OmniMic acoustic measurement software and my ears. For the purposes of explaining my methods, I’ll use my own sound system as a reference point. It includes a pair of dipole electrostatics, a pair of 15” self-powered subwoofers, a tube amplifier and preamplifier, and an 8-channel DAC connected to a laptop as the music source. One of the subwoofers is centered between the main speakers while the second subwoofer is positioned in the left rear corner, both raised 18″ off the floor. The room is treated with bass traps and absorption and diffusion panels (see photo above).
3 Subwoofer Connection Approaches
I’ll introduce three approaches in connecting a subwoofer, with the last approach adding digital time alignment into the mix. The first two approaches are typical of an average setup that uses a subwoofer’s phase control to blend its sound with the main speakers at a crossover point. For all three approaches, the subwoofers’ positioning remained the same; only their crossover frequency and slope, phase, and polarity settings changed between them.
I relied on the OmniMic frequency response chart to examine several frequency/slope combinations to try to achieve the smoothest curve without nulls, or at least with the fewest nulls, then used my hearing to validate the chosen crossover frequency and slope. The smoothest curve doesn’t always equal the best sound, but it can get us very close.
A crossover is a way of dividing the frequencies of the music between two or more speaker drivers (e.g. tweeter and woofer) and/or between a speaker and a subwoofer to avoid that they play beyond their limits or excessively overlap. A crossover comprises a “low-pass” and “high-pass” filter that a speaker designer uses to prevent a particular driver from playing certain high or low frequencies. A subwoofer’s low-pass filter prevents it from playing higher pitched instruments and vocals, while its high-pass filter prevents the main speakers from playing the lowest bass notes. A filter is set at a crossover frequency and slope whose steepness determines how quickly the filtered frequencies drop off (e.g. 24dB filter drops off fast while a 6dB filter does not).
Approach 1 (good): Removing the Bass from the Main Speakers Using the Subwoofer.
The signal chain was as follows:
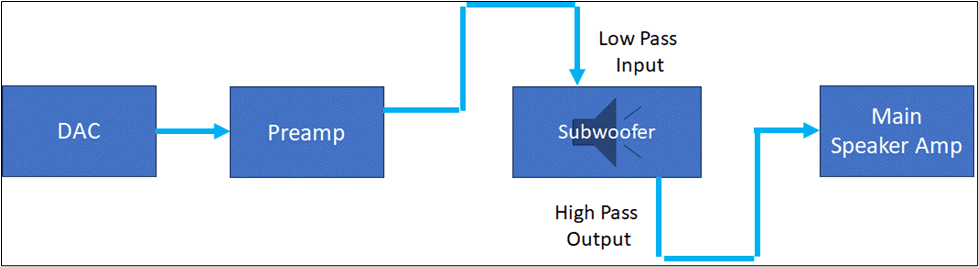
DAC > Left preamp output to left subwoofer input and left subwoofer high-pass output to left amp input (and similar connections with the right channel).
Note: To simplify the first two diagrams, only the left channel is shown.
Since my tube amp had a hard time handling low frequencies and wasn’t overly powerful to begin with, I decided to try the high-pass outputs on my subwoofers’ plate amps to feed the tube amp with frequencies at 80Hz and higher. Both subwoofers’ high-pass filters were set at 80Hz with a 24dB slope for the amp and the speakers.
Approach 2 (Better): An Active Crossover Splits the Signal Between Main Amp and Subwoofers
The signal chain was as follows:
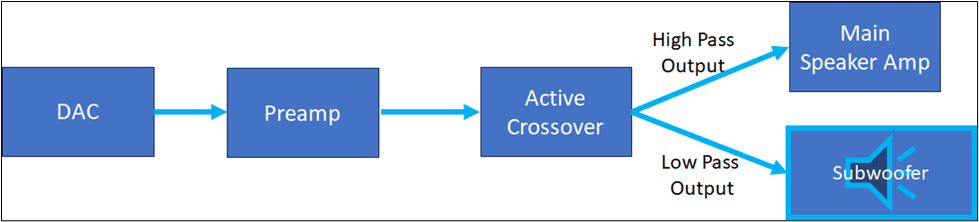
DAC > Preamp > Active Crossover > Left and right high-pass outputs to tube amp and left and right low-pass outputs to both subwoofers.
Adding an external crossover, such as a Bryston 10B STD, allowed for more flexibility in crossover frequency and slope settings for speakers and subwoofers (after the subwoofer’s internal 24dB/octave setting was bypassed). The available crossover frequency settings were 70/100/140Hz etc., while the slope choices consisted of 6/12/18dB/octave. There’s a switch on the Bryston that allows setting its bass to mono, which I used. Most bass is recorded in mono, so playing test tones in mono seemed like an acceptable option, plus it ensures that both subs are receiving the same signal, which makes it easier to find the right crossover point. The best curve I achieved was a high-pass of 140Hz at 6dB slope for the main speakers with both subwoofers low-passed at 100Hz with a 18dB slope.
Approach 3 (Best): Multichannel DAC Improves Flexibility and Control Over All Speakers
The signal chain was as follows:

DAC’s outputs 1 and 2 > left/right preamp channels > left-right amplifier channels, while the preamp outputs 3 and 4 went directly to the front and rear subwoofers respectively.
A stereo DAC can only implement frequency or time correction to both channels on a macro-level basis. What I wanted was micro-level flexibility and functions to give me the best ability to address acoustic anomalies in my room. To this end, I bought an 8-channel DAC from Toronto-based manufacturer exaSound. Equipped with digital music management services JRiver Media Center and ROON, the DAC became the foundation on which I made channel-specific adjustments. JRiver’s Digital Signal Processing functions were used to: create mono bass for both subwoofers, high-pass the main speakers at 67Hz with a slope of 24dB, low-pass the front subwoofer at 74Hz using a 12db slope, and low-pass the rear subwoofer at 80Hz with a 12dB slope. I also performed a 3ms delay and polarity reversal to the rear subwoofer. That meant that the crossover points, slopes and delays were different for the main speakers and subwoofers, even between the subwoofers. Since each speaker/subwoofer was in a unique position within the room, it stood to reason that crossover settings (and equalization afterwards) would be customized.
Next, analyzing the three approaches and comparing the best settings for each. (Part 2 out now.)


Leave a Reply